Paint Kitchen Cabinets
When planning our kitchen remodel of the cabin, we wanted to continue the our cozy, cottage theme and planned for light or white colored cabinets. We also planned to save a few bucks and purchase them from Ikea.
Unfortunately, we didnt like any of Ikeas stock white cabinet doors all were gloss finished synthetic or fiberboard. We were hoping for something rustic and something wood.
Eventually, we decided to purchase the Ikea Tidaholm oak cabinet doors in the only color in stock at the time, dark brown, and paint them white.
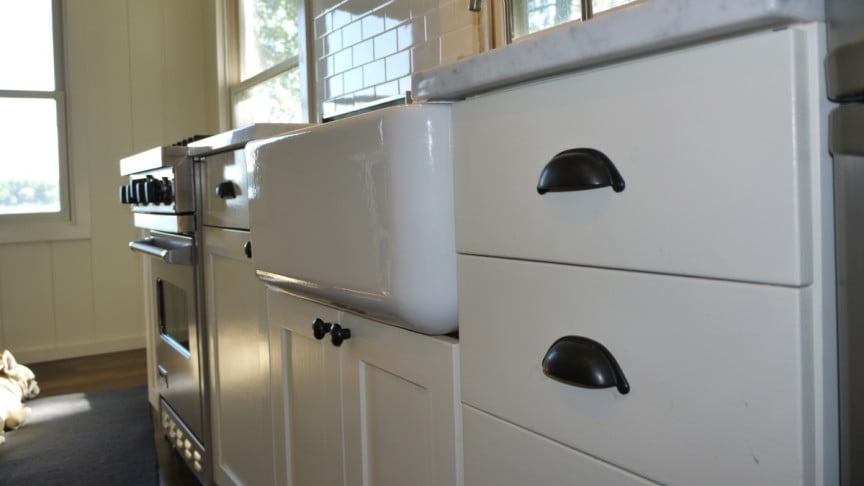
Finished cabinets after painting. Notice soft, luster finish with retained grain pattern from original Ikea Tidaholm oak doors.
The method we used to paint the cabinets was simple spray can primer and brush applied oil finish. You can certainly have them professionally sprayed, but by taking your time, using high quality paint and a few tricks, you can do it yourself and obtain a very high quality, professional finish for your cabinet doors. Read on for a step by step how to paint kitchen cabinets yourself.
This how-to walks you through the steps to paint your kitchen cabinets or cabinet doors. In this instructional, we just painted the doors, but you can apply the same steps to painting the cabinet boxes as well. If you are planning on painting your entire cabinet, remove the doors and paint them as below, and paint the cabinet enclosures in place using the same techniques.
How to Paint Kitchen Cabinets Overview
Preparation and Materials
Project Overview
- Level: Intermediate
- Time: Days Weeks
- Cost: $100 $200
Project Big Picture
- Prep kitchen.
- Remove doors and hardware.
- Create painting area.
- Painting prep.
- Prime.
- Finish.
Materials Paint and supplies
Tools / Supplies
How to Paint Kitchen Cabinets Step by Step
- Pick a quiet, clean spot to work.The location should have a table or similar to allow you to spread out the cabinet doors and should be relatively free of dust and debris that could compromise the finish of the paint.

A work table set up in the garage for the project.
- Thoroughly clean the work space.Create a dust-free environment by cleaning and vacuuming the floor, walls, table and surrounding areas. Cover the table surface with newspaper, drop cloth, cardboard or other covering to prevent damage from paint over spray and drips.
- Assemble required supplies, tools and paint.You will need prep materials including a sanding block, rags, tack cloth, a primer paint and a finish coat paint. I used an alcohol (shellac) based primer Zinsser® B-I-N for its fast drying, high coverage qualities. The alcohol base also provides excellent bite and adhesion. For the finish, I used Benjamin Moores® Satin Impervo® oil (alkyd) paint. I cannot stress enough the importance of using high quality paint if you want high quality results. To the Impervo, I added Penetrol® paint additive by Flood to improve paint flow and finish leveling.

Shellac based primer Zinsser® B-I-N.
- Remove cabinet doors and assemble in work space.If painting existing, in place cabinets and doors, remove and paint the doors first. Prior to removing doors, mark the doors in a hidden area (back) and make a diagram of there location before removal. Save hardware in zip lock bags or similar for reassembly. Move doors to work area.
- Lightly sand the cabinet doors.Using a medium to fine sanding sponge or similar (I used a 3M fine grit sanding sponge), working in the direction of the wood grain sand the surfaces of the cabinets. Use care not to round off edges when sanding. If the cabinet doors you are painting are not new, be sure to thoroughly clean the surface of the doors prior to sanding. Use a solvent based de-greaser if the cabinet doors have been in service for some time, as kitchen cabinet doors tend to accumulate oily deposits.

Clean, sand, and prep surface of cabinet doors prior to applying primer coat of paint.
- Remove dust and sanding residue.Use an alcohol dampened microfiber cloth to wipe away residue sanding dust. Finish the cleaning process with a clean tack cloth.
- Re-Clean work space and apply first coat of primer.Prior to painting, it is a good idea to vacuum the work space and work surface to remove residual dust from the sanding process. Once the work area is clean, arrange the clean, sanded cabinet doors for application of the first primer coat of paint. For primer application I found using spray can formulation of the Zinsser BIN primer to provided easier application and better results compared to brush application. As always, with spray applications of paint, it is preferable to apply several lighter coats of paint rather than one heavy coat. I sprayed one side at a time, allowed to dry for one hour, then sprayed the opposite side. Once both sides were covered, I allowed the doors to dry overnight before applying a second coat.
- Apply second primer coat.After drying overnight, each door was very lightly sanded to remove any high primer spots. After sanding, I again used an alcohol dampened microfiber cloth to remove sanding dust and finished the clean up with a tack cloth. I then applied a second coat of primer to each side, allowing each side to dry for an hour before painting the next. Once both sides were covered with the second coat, I allowed the doors to again to dry overnight before starting the finish coat application.

Lightly sanding after second coat of primer.
After the second coat of primer, I again lightly sanded the primer and cleaned with a microfiber cloth, followed by a clean tack cloth.

Take time to thoroughly remove sanding dust using tack cloth.
- Prep work area for finish coat.To obtain a smooth, dust free finish, it is important to work in a dust free environment. Spend some time again cleaning the work area prior to applying your finish coat of paint. Once everything was clean, use a tack cloth to ensure the surface of the work table and cabinet doors are free of dust.
- Apply finish coat of paint. For the finish, I used Benjamin Moores Satin Impervo Alkyd low-luster paint. This paint is expensive ($75 + / gallon), but it is an exceptional paint that has excellent leveling qualities. Beware that this is an oil based product and lighter colors may yellow with time.

Finish paint for the cabinets Benjamin Moore Satin Impervo.
Prior to applying the finish coat, I added the paint additive Penetrol to help provide a smooth finish without brush marks. Penetrol is a petroleum based solvent that when added to oil based paints lengthens drying time and helps level the finish.
To keep the finish paint stock, I only added Penetrol to individual small batches mixed for each painting session. Mix these batches in disposable plastic one pint containers, using a new container for each painting session to avoid dust and debris contamination.
If you return any paint to the original can, pour it through a fine paint filter to remove any dust accumulated during use.

Ready to Finish: a Corona China bristle / ox hair brush, a high-quality foam roller, and Benjamin Moore Satin Impervo Alkyd in white chocolate with Penetrol added.
To apply the finish coat of paint, first roll the paint on the door to obtain a uniform layer, then use a brush to level the finish. When using the brush, I found that using a very low brush angle helped avoid brush marks in the finish.

Applying an even coat of finish to the cabinet drawers using a small roller.

Finish coat application to the cabinet doors using Benjamin Moore Satin Impervo by first rolling then brushing the finish.
After one side was finished, I lifted the door and carefully painted the edges. Each coat of the Penetrol spiked Impervo needed at least 48 hours to dry, so I painted only one side at a time.I allowed the doors to dry resting flat to help prevent paint runs. Once one side was dry, the doors were flipped and the opposite sides painted. The doors were then allowed to dry for several weeks.
- Lightly sand the first finish coat and apply a second coat (optional). Using very fine emery cloth or sanding block, very lightly sand the dry first finish coat to remove any dust contamination or surface irregularities. Wipe clean with microfiber cloth and finish with tack cloth. You can wipe the surface one more time with a clean microfiber cloth dampened with mineral spirits. Then, using the same techniques as the first finish coat, apply a second finish coat and allow to dry.
- Polish the finish (optional). I wanted a rather soft, matte finish, so after letting the final finish coat cure for several weeks, I very lightly polished the painted surface with polishing compound (Cyclo Industries No.7 white) and a soft cloth. I buffed the surface just to soften the finish and level the paint. After polishing, I washed the doors thoroughly with soapy warm water. (Beware that this and many polishing compounds have a mild solvent odor that may take a few weeks to fade from the polished surfaces.)
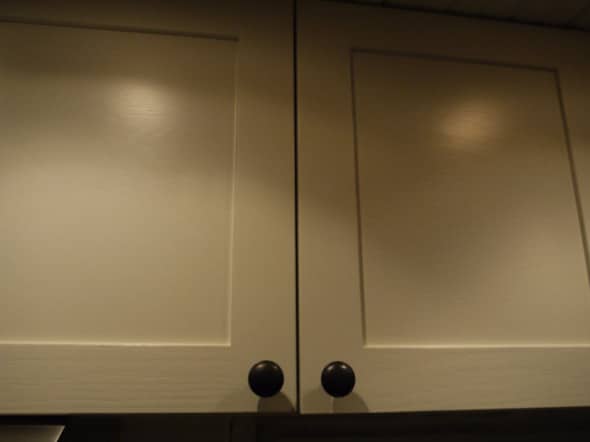
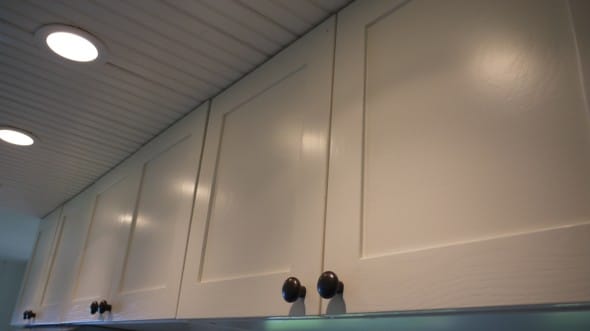
Mate finish of Benjamin Mooresatin impervo oil finish on kitchen cabinets.
If you are painting the doors and the cabinet bodies, follow the above sequence to paint the cabinet boxes in place. Tape off and cover walls, counters, appliances and anything else at risk of getting splattered with paint. Consider rolling or brushing on the primer instead of spraying if painting the cabinet bodies in place. You may want to alternate door painting with cabinet body painting during drying periods. Protect each area (door painting area and kitchen cabinet painting area) from sanding dust contamination from the other during prep periods.
Paint Kitchen Cabinets Image Gallery
Paint Kitchen Cabinets - Cabin DIY - How To DIY Home ...
Paint Kitchen Cabinets Paint Kitchen Cabinets Yourself. When planning our kitchen remodel of the cabin, we wanted to continue the our cozy, cottage theme and planned
How to Paint Kitchen Cabinets - DIY Network - Home ...
Update your kitchen and give it a fresh look by painting the cabinets.
Painting Kitchen Cabinets : How-To : DIY Network
Painting Kitchen Cabinets Freshen up a Kitchen by Painting the Cabinets; DIY Network Blog Cabin 2014; DIY Popular Topics;
Cabin DIY
How To DIY Projects For Cabin, Cottage or Home. How To Home Projects for your Cabin, Paint Kitchen Cabinets
Learn How To Paint Perfect Kitchen Cabinets | Made + Remade
and a detailed step-by-step tutorial on painting kitchen cabinets using high-quality paint and a paint for cabinets; Oil-based KILZ DIY Blog Cabin;
Paint Kitchen Cabinets Cabin Diy
Paint Kitchen Cabinets Yourself. When planning our kitchen remodel of the cabin, we wanted to continue the our cozy, cottage theme and planned for light or white
How To Paint Kitchen Cabinets White | DIY Cozy Home
Thanks for the tutorial on painting cabinets! I love the look and found some great hardware at Look in the Attic & Company to use for this project!
DIY Painting Kitchen Cabinets Ideas + Pictures From HGTV ...
But DIY kitchen cabinet painting ideas could save you some money in there are many DIY ideas for painting kitchen cabinets. HGTV Products for Your Home;
How to Paint Kitchen Cabinets: A Step-by-Step Guide to DIY ...
I'm here to burst a few bubbles and tell you that painting kitchen cabinets is Kitchen Makeover, home paint my cabinets it will look like a DIY.
How to Paint Kitchen Cabinets - DIY Home Decorating Ideas
Learn how to paint kitchen cabinets and avoid the common problems many people wind up with because they took short cuts. Short cuts are bad! Not always, but in this
Travelling is my life
1 comments:
Click here for commentsWhen Choosing a Solar Contractor, it is always an advantage for them to be local, reliable, articulate and friendly. Use American products only. Solar Earth is all of the above, located in the beautiful Santa Ynez Valley. All the Modules installed are manufactured in America and backed by a twenty-five year guarantee.
best Home Solar Electric System Installer in Santa Barbara
ConversionConversion EmoticonEmoticon